Reconnecting Your Board and Cables: A Simple Guide for Success 2H & 4H
Share
Reconnecting Your 2H Print Head: Easy Steps for a Smooth Setup
When you're installing a new board or reconnecting communication cables, it's crucial to follow the proper steps for a smooth and safe setup. Remember—safety first! Always ensure the power is turned off before working with any electrical components.
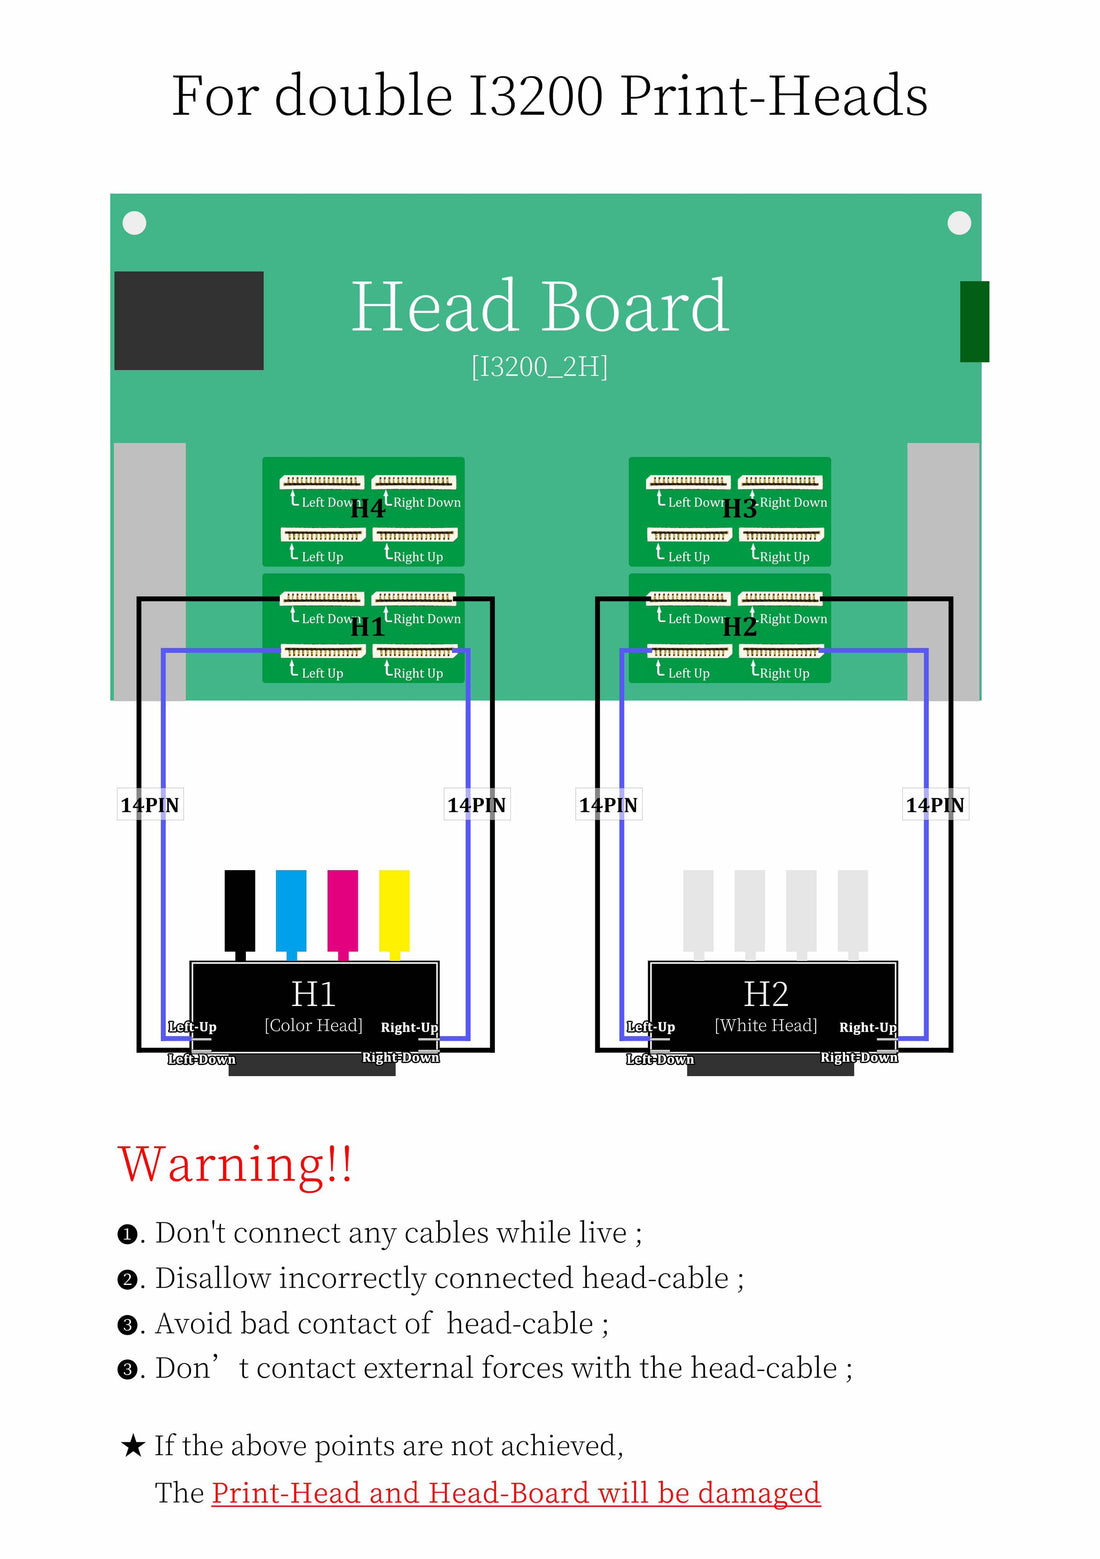
To help guide you through the process, we've included a handy diagram for reconnecting a 2H print head on an i3200 printer. This visual will make it easy to get everything back in place and running smoothly.
With just a few simple steps, you'll be up and printing in no time. Stay safe, follow the diagram, and enjoy the process!
2H connecting to a i3200 Board

Reconnecting Your 4H Print Head: Easy Steps for a Smooth Setup
When installing a new board or reconnecting the communication cables, it’s essential to follow the correct procedure to ensure everything functions flawlessly. And remember—safety is key! Always make sure the power is turned off before working with any electrical components.
We’ve provided a detailed diagram to guide you through reconnecting the 4H print head on your i3200 printer. This will make the process quicker, easier, and more efficient.
By following the steps and using the diagram, you’ll have your printer back in action with minimal effort. Stay safe and enjoy the process—you're just a few steps away from perfect prints!

