



DTFPartsStore.com
Dtf Ink Clip Tube Hose Lock
Dtf Ink Clip Tube Hose Lock
Couldn't load pickup availability
Take control of your ink flow with the ultimate DTF Printer Tubing Clamp—designed to fit tubing with an outside diameter of 1/2" - 3/4" (or 12mm - 18mm), making it compatible with a wide range of printers
Why You’ll Love It:
- Precision Ink Control: Whether you need to pause ink flow for a quick cleaning or during a damper change, this clamp gives you total control with great precision. Say goodbye to ink spills and hello to flawless prints!
- Durable & Flexible: Made from high-quality POM plastic, this clamp is tough, flexible, and built to last, giving you both excellent elasticity and strong clamping force to secure your tubing in place.
- Easy to Use: It's designed to be simple and convenient—just clamp it on, adjust your ink flow as needed, and you’re good to go. No fuss, no mess—just smooth, efficient printing.
Perfect for:
- DTF Cleaning and Maintenance: Need to pause ink flow during a quick cleaning or when changing a damper? This clamp has you covered, making maintenance a breeze!
- Reliable Ink Flow Control: Achieve consistent ink flow for even the most precise print jobs, without worrying about interruptions or overflows.
Make your DTF printing process even smoother with this high-quality tubing clamp—it’s a small tool that makes a big difference in performance! ✨

DTF Parts Store • Repair supportInstallation & troubleshooting
View safety steps and replacement checks
Know what to check, how to prepare safely, and what your technician should verify for this ink system. Machine layouts and wiring vary by model.
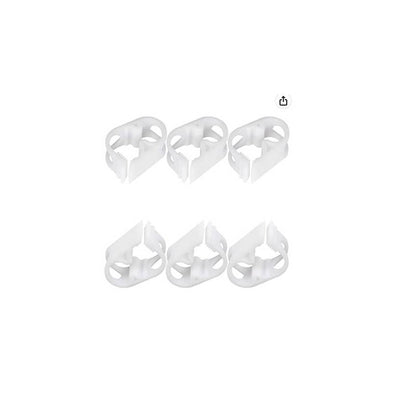
Dtf Ink Clip Tube Hose Lock
Match before replacing:
Ink compatibility • size • flow direction • seal
Ink starvation, air in lines or leakage can arise from seals, tubing, pumps, dampers or capping. Confirm the cause before replacing parts.
Safety first — before access or repair
Follow the machine’s shutdown procedure. Isolate all power sources and prevent restart using the approved lockout procedure. Control stored energy and let heaters cool fully. An authorized person must verify isolation before work starts. The power button or emergency stop alone does not isolate electrical energy.
Electrical work, heaters and safety controls require a qualified technician. Never work inside a live cabinet, bypass guards or safety devices, or reach into moving rollers or fans. Follow the machine manual and powder/ink safety data sheet for required protective equipment.
Stop & isolate
Shut down, isolate supplies, prevent restart, control stored energy and verify the machine is safe to access.
Inspect & match
Follow the printer’s shutdown and ink-system service procedure. Use compatible gloves and eye protection, contain drips, and check visible leaks or air in the lines without touching the nozzle face.
Replace correctly
Use a trained technician and the exact printer service procedure for ink isolation, component replacement and priming. Preserve line routing and flow direction. Never force fluid into a printhead or substitute an unapproved solvent.
Verify operation
Check for leaks and complete the printer’s specified prime, nozzle check and calibration. Stop if ink reaches electrical connectors.
Stop and get help if…
You find burned wiring, repeated breaker trips, damaged safety controls, uncontrolled heating, ink on electronics, a mismatch in ratings, or a diagram that does not match the machine. Keep the machine out of service until a qualified technician resolves the fault.
What to send for model-specific help
Send the machine model and serial label, a clear photo of the original component and its markings, your symptom, and the relevant service-manual page. Take internal photos only after safe isolation by an authorized person. Do not unplug or move wires just to photograph them.
Need the procedure for your machine?
Send your model and original part photos so we can help confirm compatibility and the correct service reference.
Get part-specific help →This is a service planning overview. Use the exact machine and component manuals for removal, wiring, torque settings, calibration and commissioning. It is not a model-specific wiring diagram.